How Do You Cut Acrylic Splashback Panels?
Acrylic splashbacks are a strategic choice—lightweight, cost-effective, and visually adaptable. However, cutting them incorrectly can compromise both finish quality and structural integrity. Precision and process discipline matter here.
This guide breaks it down into a controlled, repeatable workflow.
What’s the Best Way to Cut Acrylic Splashback Panels?
Short answer: Use the right tool, control heat, and prioritize clean edges.
There are three proven methods depending on the level of precision required and the tools available:
- Scoring and snapping (for thin sheets)
- Circular saw or table saw (for straight, long cuts)
- Jigsaw (for cut-outs and curves)
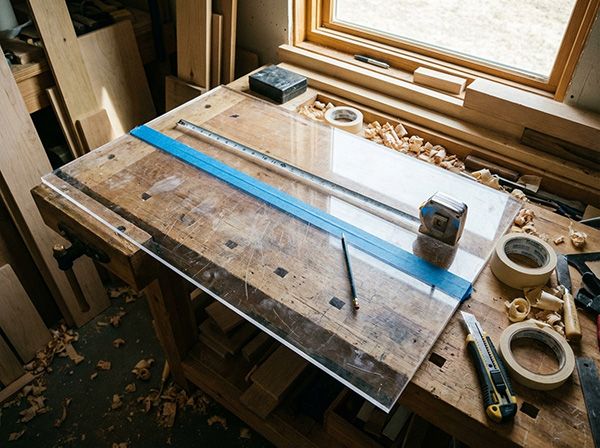
Step 1: Prepare the Panel Properly
Before cutting, lock in your setup.
- Keep the protective film on the acrylic to prevent scratches
- Place the panel on a flat, stable surface
- Mark your cut line using a fine-tip marker or masking tape
Why this matters: Acrylic is prone to chipping and melting. Preparation reduces both risks.
Step 2: Choose the Right Cutting Method
1. Scoring and Snapping (Best for Thin Panels)
- Use a plastic scoring knife
- Score along a straight edge multiple times (10–15 passes)
- Align the score line with the edge of a table and apply firm downward pressure
Use case: Panels under ~4mm thickness
Limitation: Not suitable for complex shapes or thick materials
2. Circular Saw or Table Saw (Best for Straight Precision Cuts)
- Use a fine-tooth blade (60–80 teeth) designed for plastics
- Cut slowly and steadily to avoid heat buildup
- Support both sides of the panel to prevent vibration
Key control factor: Heat. Too much friction melts the acrylic, leading to rough edge
3. Jigsaw (Best for Cut-Outs and Curves)
- Fit a fine-tooth blade (10–14 TPI)
- Use low to medium speed
- Drill a starter hole if cutting internal shapes (e.g., sockets)
Use case: Electrical cut-outs, custom shapes, tight corners
Step 3: Manage Heat and Friction
This is where most failures happen.
- Avoid rushing the cut
- Pause if the blade starts binding
- Do not remove protective film until finishing is complete
If you see melted edges forming, your speed is too high or the blade is wrong.
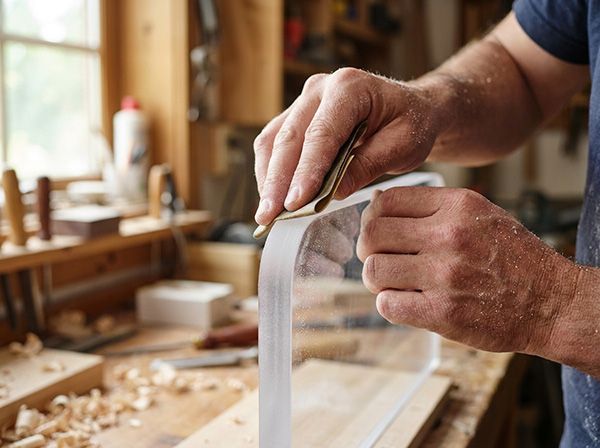
Step 4: Finish the Edges
After cutting, refine the finish:
- Use fine sandpaper (400–600 grit) for smoothing
- Progress to higher grit (1000+) for a polished edge
- Optional: Use a plastic polish compound for a glass-like finish
Step 5: Dry Fit Before Installation
Always test placement before final fixing.
- Check alignment against walls and sockets
- Confirm no stress points or tight fits
- Adjust if necessary before adhesive is applied
Common Mistakes to Avoid
- Cutting too fast → leads to melting and rough edges
- Using wood blades → causes chipping
- Removing protective film too early → surface scratches
- Poor support → leads to cracks or uneven cuts
Final Takeaway
Cutting acrylic splashback panels is not complex—but it is process-sensitive. The difference between a professional finish and a flawed one comes down to tool selection, cutting speed, and heat control.
Operate with precision, and the material performs exactly as intended—clean, modern, and installation-ready.